How to connect to a VDS using a macOS device?
After placing your order and successfully completing the payment, the service will start automatically. This process may take up to 15 minutes. Once completed, you will receive a server activation email at the address you provided during the order. This email will contain all the necessary information to access the server.
To access the virtual server from a macOS device, follow these steps:
Step 1
Download the “Remote Desktop” app from the App Store.
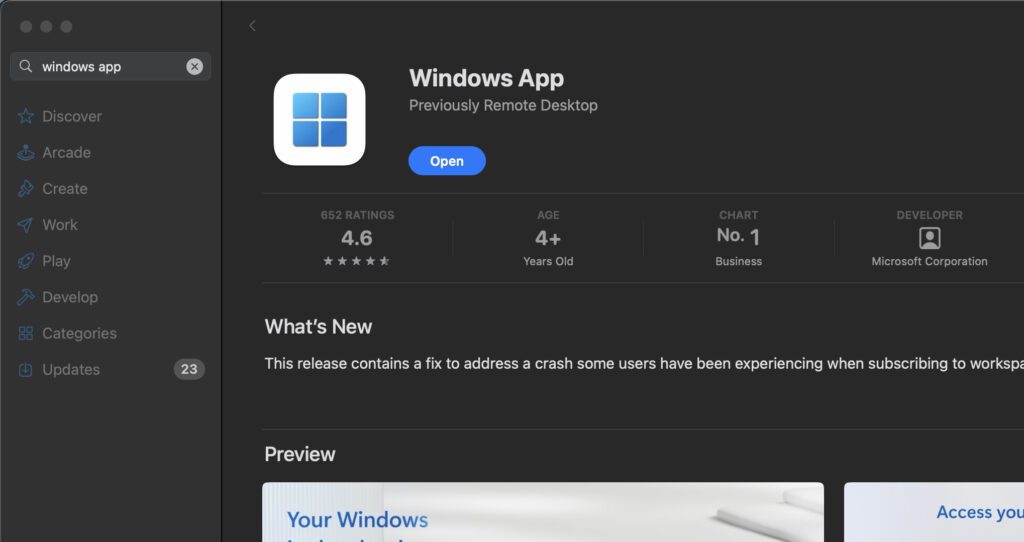
Step 2
Once the installation process is complete, open the application. Click the “+” icon at the top to add a remote computer. Then select “Add PC.”
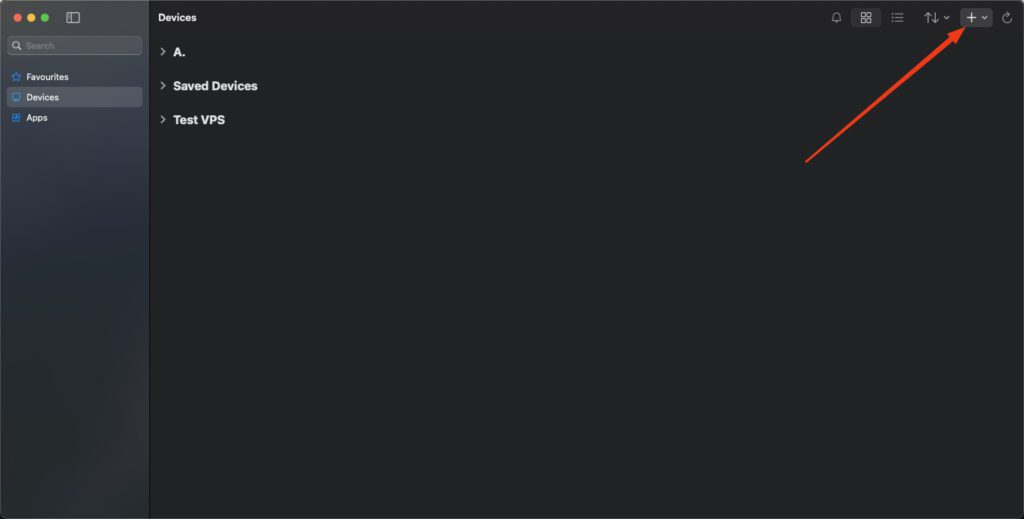
Step 3
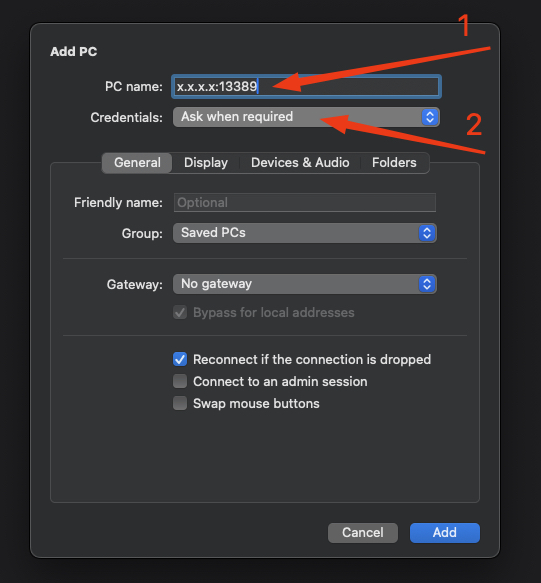
In the “PC Name” field, enter the IP address of the virtual server that you received in the activation email.
After entering the IP address, click the “Credentials” dropdown menu. Press “Add Credentials,” and a new window will open.
Step 4
Enter the server username and password. You received this information in the server activation email. After entering the details, click “Add.”
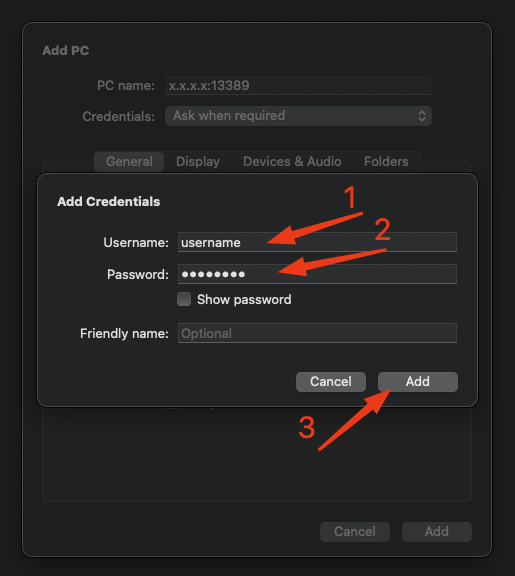
Important – Carefully check that you have correctly highlighted and copied the information from the email. There is a higher chance of errors in this step, and if the data is copied incorrectly, you will not be able to connect to the server.
Step 5
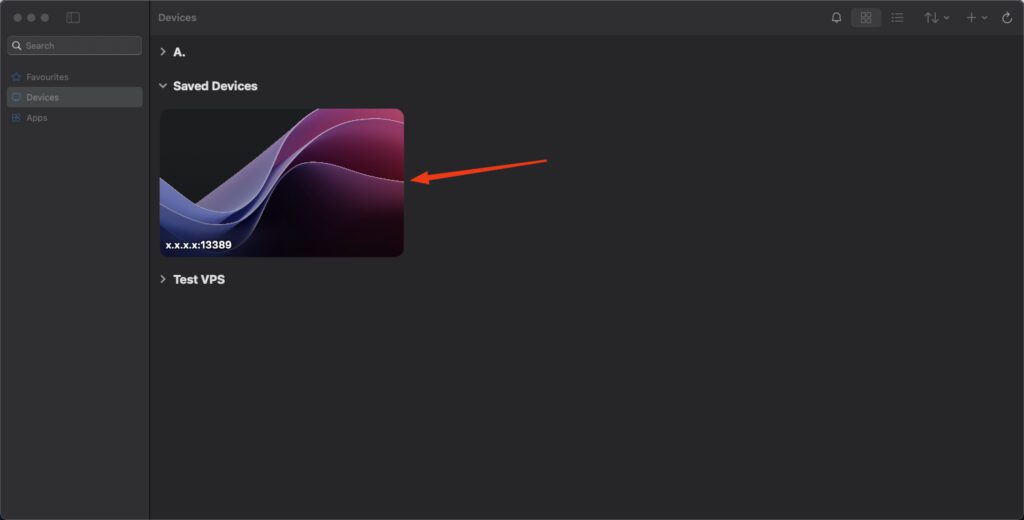
Click “Add” again, and your virtual server will be added to the list of connections. Click on it to initiate the connection.
Step 6
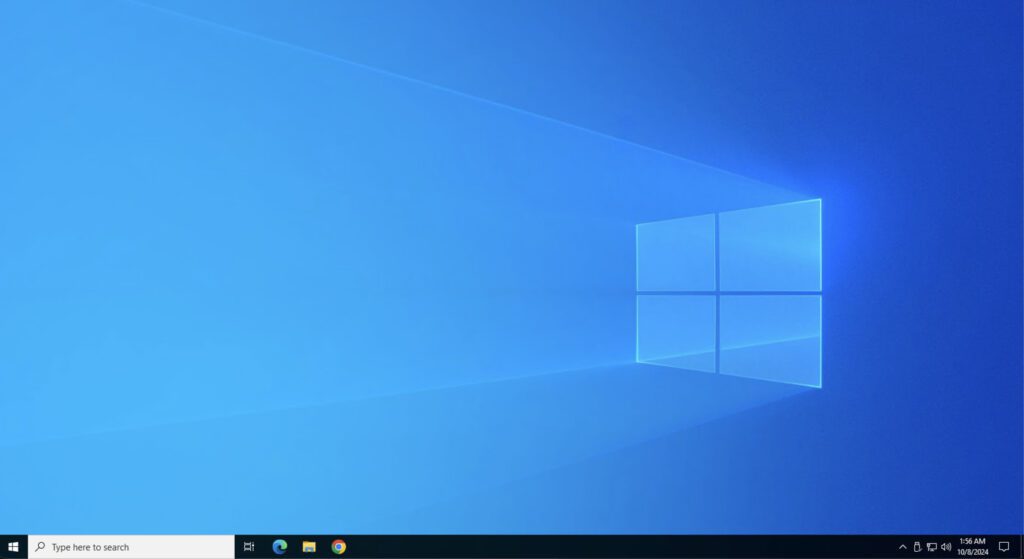
If all steps are completed correctly, a new window will open, displaying the desktop of your virtual server.
 Liutauras Morkaitis