How to connect to a VDS (Virtual Dedicated Server) using a Windows device?
After placing your order and successfully completing the payment, the service will start automatically. This process may take up to 15 minutes. Once completed, you will receive a server activation email at the address you provided during the order. This email will contain all the necessary information to access the server.
There are several ways to connect to a VPS server. Our team recommends using the built-in “Remote Desktop Connection” program in the Windows operating system or the free “Microsoft Remote Desktop” app, which you can download from the Microsoft Store.
Using the integrated “Remote Desktop Connection” application
Step 1
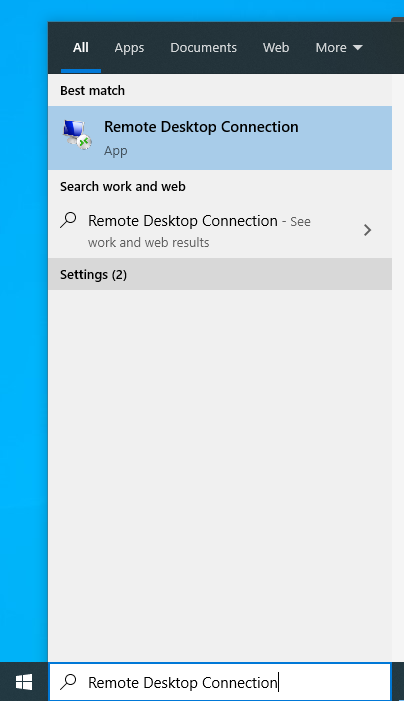
In the search bar, type “Remote Desktop Connection” and open the application.
Step 2
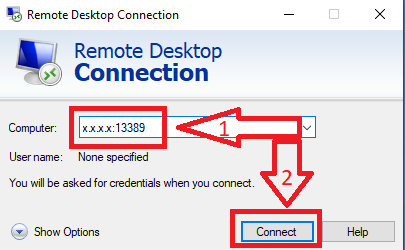
In the application window, in the “Computer” field, enter the server’s IP address, which you received in the activation email. Click “Connect” to connect to the virtual server.
Step 3
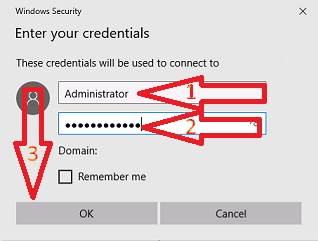
When a new window appears, enter the username and password. You received this information in the server activation email.
Important – Make sure to carefully check and copy the data correctly from the email. There is a higher chance of error in this step, and if the data is copied incorrectly, you will not be able to connect to the server.
Step 4
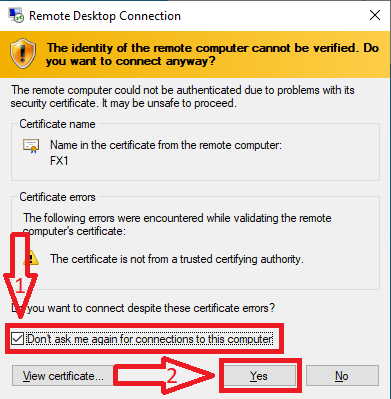
Check the box that says “Don’t ask me again for connections to this computer” and click “Yes.”
Step 5
If all steps are completed correctly, a new window will open, displaying the desktop of your virtual server.
Using the Microsoft Remote Desktop application
Step 1
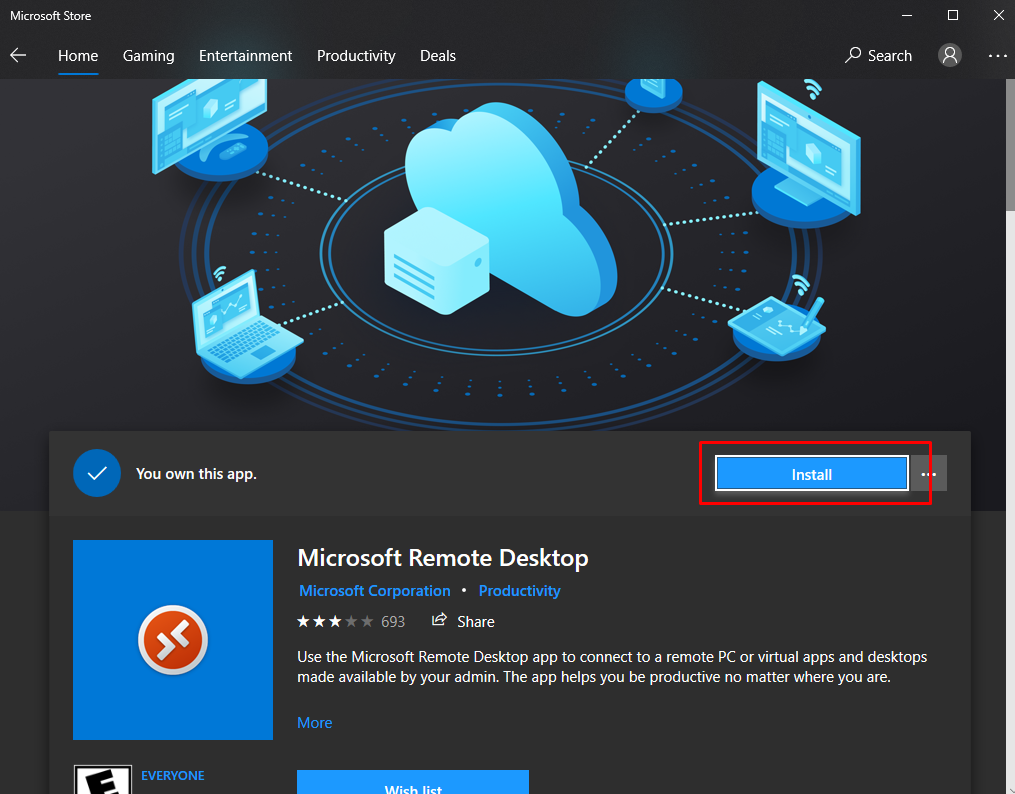
On your Windows device, open the Microsoft Store app library and install the “Microsoft Remote Desktop” application provided by Microsoft.
Step 2
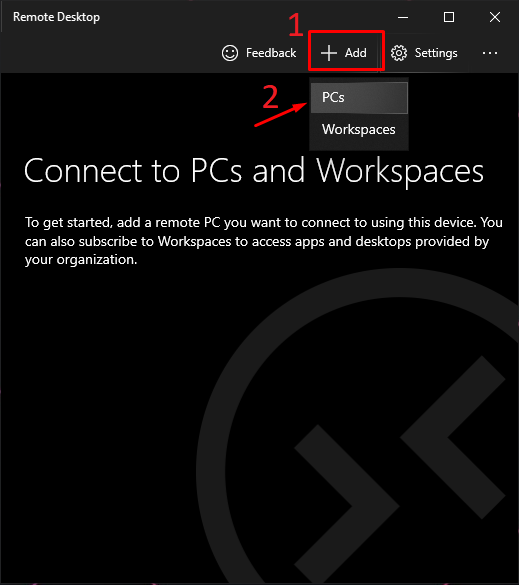
Once the installation process is complete, open the application. At the top, click the “+ Add” button and select “PCs.”
Step 3
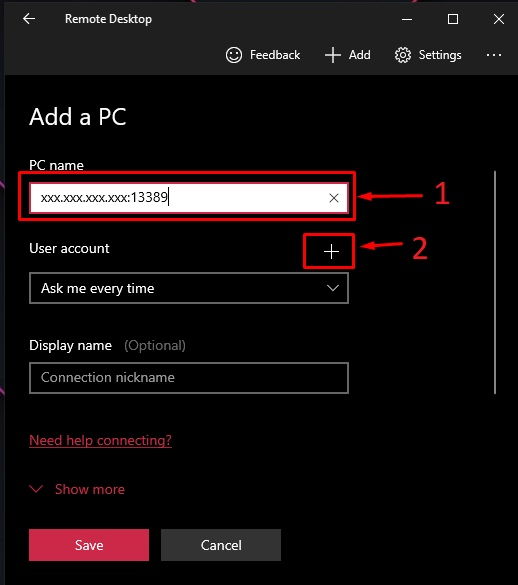
In the “PC Name” field, enter the IP address of the virtual server that you received in the activation email.
After doing this, click the + icon next to the “User account” section to add your login information.
Step 4
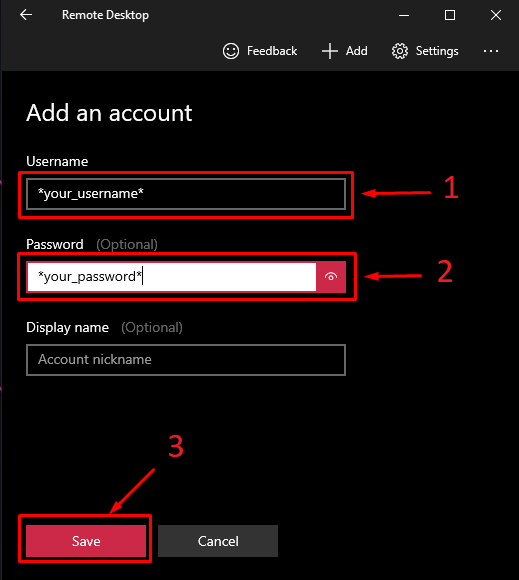
Enter the username and password for the new server. You received this information in the server activation email. After entering the details, click “Save.”
Carefully check that you have copied the information correctly from the email to avoid any accidental spaces or missed characters.
Step 5
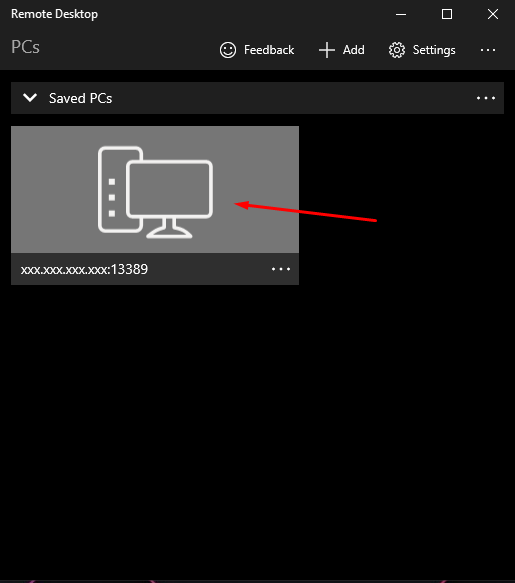
Click “Save” again to save the server login credentials. Once done, you will find the newly added remote computer in the list. Click on it to establish a connection.
Step 6
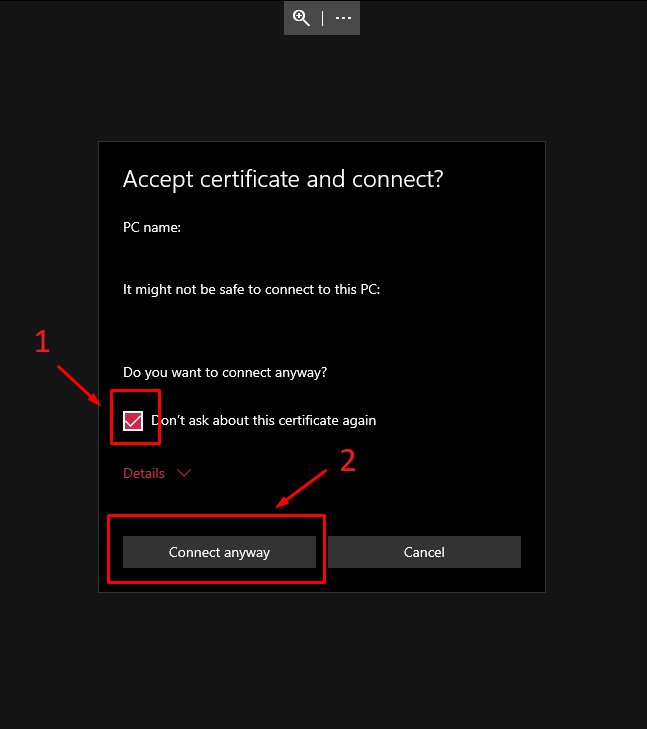
Check the box that says “Don’t ask about this certificate again” and click “Connect anyway.” If all steps are completed correctly, you will see the desktop of your virtual server.
 Liutauras Morkaitis